Github Actions is a free CI/CD solution that comes along with every Github account. It enables you to test, build and deploy your code you push to your Github repository. When using a free (non-payed) Github account, it comes with some limitation though. Which you can workaround by using your own, selfhosted Actions runner host.
Introduction
Github Actions use so called “runners” for executing the CI/CD Action (or pipeline) on. They make a pretty good offer to you in providing Github runners to your account which are computing power and storage which run in the Github datacenters. So you don’t really need much to get your project started. But as pointed out, there are some limitations on the Github runners, which can be quite complex to understand. Let’s have a brief look into them.
For instance, they depend on if your repository is private or public and if you’re a paying Github customer or using a free account. When you use Actions on a private repository and run them on a Github runner, a free account user would be limited on storage and time. You could use up 500MB of storage and can spend 2.000 minutes per month for a free account. Another limitation is, that on Github hosted runners, a job can run 6 hours at maximum.
You can find detailed information on all existing limits here and here.
I admit, these are pretty high numbers to reach for a small software project. But the storage alone, could be a real problem. Most (not all) of these limitations are gone or at least way higher when you use a selfhosted Github runner. It’s also quite easy to setup such a runner host. So let’s see how this works.
Warning: Github and also I advice to use selfhosted runners only for private repositories. There is the risk on public repositories, that malicious code get to run on your runner and therefore be directly in your network.
Prerequisites:
- A Linux / Windows or MacOS machine / VM
- All software you might need for testing, building and running your code / software on (e.g. Docker) needs to be installed on this host
Install runner
A self hosted runner will “watch” for work to do. So there is no need to expose the runner to the Internet. It will need Internet access though, in order to check for work to be done.
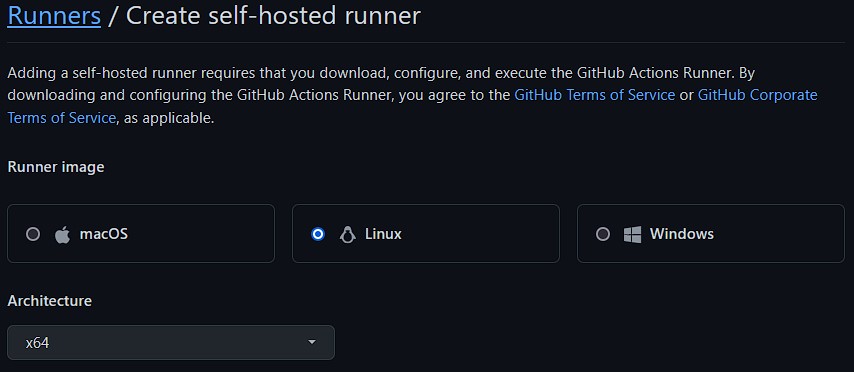
First step in building your own runner is, to head to your repositories settings and in there to “Actions => Runners”. Click on “New self-hosted runner” and select the OS and architecture of your runner.
After this selection, you will get shown a detailed set of instructions / commands, you will need to run on your designated runner VM or host. What’s not explicitly named is, that you must not be root to configure the runner. I recommend you to create specific “runner” user.
useradd -s /bin/bash -m -d /home/runner -G sudo runner
su - runner
A the time of writing, for a Linux runner, the set of commands is the following:
# Download

# Create a folder
$ mkdir actions-runner && cd actions-runner
# Download the latest runner package
$ curl -o actions-runner-linux-x64-2.290.1.tar.gz -L https://github.com/actions/runner/releases/download/v2.290.1/actions-runner-linux-x64-2.290.1.tar.gz
# Optional: Validate the hash
$ echo "2b97bd3f4639a5df6223d7ce728a611a4cbddea9622c1837967c83c86ebb2baa  actions-runner-linux-x64-2.290.1.tar.gz" | shasum -a 256 -c
# Extract the installer
$ tar xzf ./actions-runner-linux-x64-2.290.1.tar.gz

# Configuration

# Create the runner and start the configuration experience
$ ./config.sh --url https://github.com/thedatabaseme/somerepo --token XXXXXXXXXXXXXXXXXXXXXXXXXXXXX
# Last step, run it!
$ ./run.sh
During the configuration step, you will get asked some questions (e.g. how the runner should be named).
--------------------------------------------------------------------------------
|        ____ _ _   _   _       _          _        _   _                      |
|       / ___(_) |_| | | |_   _| |__      / \   ___| |_(_) ___  _ __  ___      |
|      | |  _| | __| |_| | | | | '_ \    / _ \ / __| __| |/ _ \| '_ \/ __|     |
|      | |_| | | |_|  _  | |_| | |_) |  / ___ \ (__| |_| | (_) | | | \__ \     |
|       \____|_|\__|_| |_|\__,_|_.__/  /_/   \_\___|\__|_|\___/|_| |_|___/     |
|                                                                              |
|                       Self-hosted runner registration                        |
|                                                                              |
--------------------------------------------------------------------------------

# Authentication


√ Connected to GitHub

# Runner Registration

Enter the name of the runner group to add this runner to: [press Enter for Default]


Enter the name of runner: [press Enter for ubuntu2004]

This runner will have the following labels: 'self-hosted', 'Linux', 'X64'
Enter any additional labels (ex. label-1,label-2): [press Enter to skip] test

√ Runner successfully added
√ Runner connection is good

# Runner settings

Enter name of work folder: [press Enter for _work]

√ Settings Saved.
You might have tried out the run.sh script. This will start the runner. But it’s useful to start the runner whenever the VM starts and to run it as a service in the background. To do so, you can use the svc.sh script, that comes with the downloaded runner package.
sudo ./svc.sh install
[sudo] password for runner:
Creating launch runner in /etc/systemd/system/actions.runner.thedatabaseme-cookbooks.ubuntu2004.service
Run as user: runner
Run as uid: 1001
gid: 1001
Created symlink /etc/systemd/system/multi-user.target.wants/actions.runner.thedatabaseme-cookbooks.ubuntu2004.service → /etc/systemd/system/actions.runner.thedatabaseme-cookbooks.ubuntu2004.service.

sudo systemctl start actions.runner.thedatabaseme-somerepo.ubuntu2004.service
sudo systemctl status actions.runner.thedatabaseme-somerepo.ubuntu2004.service
● actions.runner.thedatabaseme-cookbooks.ubuntu2004.service - GitHub Actions Runne>
     Loaded: loaded (/etc/systemd/system/actions.runner.thedatabaseme-cookbooks.ub>
     Active: active (running) since Sat 2022-04-30 22:21:29 UTC; 2s ago
   Main PID: 2174 (runsvc.sh)
      Tasks: 21 (limit: 462)
     Memory: 53.6M
     CGroup: /system.slice/actions.runner.thedatabaseme-cookbooks.ubuntu2004.servi>
             ├─2174 /bin/bash /home/runner/actions-runner/runsvc.sh
             ├─2176 ./externals/node16/bin/node ./bin/RunnerService.js
             └─2193 /home/runner/actions-runner/bin/Runner.Listener run --startupt>

Apr 30 22:21:29 ubuntu2004 systemd[1]: Started GitHub Actions Runner (thedatabasem>
Apr 30 22:21:29 ubuntu2004 runsvc.sh[2174]: .path=/usr/local/sbin:/usr/local/bin:/>
Apr 30 22:21:29 ubuntu2004 runsvc.sh[2176]: Starting Runner listener with startup >
Apr 30 22:21:29 ubuntu2004 runsvc.sh[2176]: Started listener process, pid: 2193
Apr 30 22:21:29 ubuntu2004 runsvc.sh[2176]: Started running service
This should do the trick. Let’s check the runners overview in your repository settings. You should see the runner registered and running there.
Using self-hosted runner
You can start to use the runner now by specifying it within your Actions workflow file. Place your workflow file in your repository under the .github/workflows directory. I’ve uploaded a demo workflow in my cookbooks repository. The only thing you need to change in order to use the self-hosted runner, is to specify so in the runs-on section of your workflow. Beside from specifying a workflow should run on a self-hosted runner, you can also give a list of tags to the runs-on parameter. This comes handy, when you have multiple runners setup which have different specifications (for instance windows or linux runners).
runs-on: [self-hosted, linux]Scaling Github runners
Another nice feature would be, to automatically scale your self-hosted runners like Github does for their own runners. So when a queue of workflows build up, another self-hosted runner is spinning up automatically. This is also possible, but I won’t go into much detail here, cause I’ve not tested it out by myself. You can use a Kubernetes controller which creates runner pods on your Kubernetes cluster automatically. The project for this, can be found here. I will probably check this out in a future blogpost.
Another (not so highly automated) approach would be, to use Vagrant to quickly spin up runner VMs for you. I’ve created a template for this, which builds an Ubuntu box for you and creates a runner OS user for you. So you can start from there to add tis box as a self-hosted runner and destroy it after your workflow(s) has finished. You can find the Vagrantfile also in my repository here. Clone the repository, head to the vagrant/github_actions_runner directory and deploy it by using vagrant up. If you want to find more information on Vagrant, you can have a look into my other blogpost regarding running Vagrant on WSL2.
You can ssh into your box by running vagrant ssh. Then follow the instructions from above to deploy the self-hosted runner.
Philip