Wanting to have a S3 compatible Object Storage costs you money when ordering it with a Cloud provider out there. Self hosting it on your existing Homelab is for free and also fun to do. So let’s have a look into how to deploy MinIO Object Storage on your Docker environment.
MinIO is an open source alternative to other S3 Object stores. It’s also enterprise ready (even we’re not setting it up like that in this tutorial) with features like distributed services and Kubernetes integration. We keep it small here and setup MinIO as a single container on our Docker host to provide Object Storage / Buckets in our Homelab.
Installation
You might want to download the docker-compose.yaml I’ve prepared to run MinIO from my Github repository. Surely you want to adjust it to your needs and provide a custom secret for the root user to login later to the WebUI. This is done by adjusting the environment variable MINIO_ROOT_PASSWORD within the docker-compose.yaml.
version: '2'

services:
  minio:
    container_name: Minio
    command: server /data --console-address ":9001"
    environment:
      - MINIO_ROOT_USER=admin
      - MINIO_ROOT_PASSWORD=supersecret
    image: quay.io/minio/minio:latest
    ports:
      - '9000:9000'
      - '9001:9001'
    volumes:
      - /docker/minio:/data
    restart: unless-stopped
As you can see, we’re exposing two ports to the container, 9000 and 9001. The port 9001 will be the port, we access the WebUI soon. Also be aware, that we’re doing a bind mount of the local directory /docker/minio on the Docker host to the container under the /data directory. You want to adjust the local directory to any directory you want MinIO save it’s configuration and later the bucket data to. Bring the container up by using the docker-compose command.
docker-compose up -d

Creating network "minio_default" with the default driver
Pulling minio (quay.io/minio/minio:latest)...
latest: Pulling from minio/minio
510abfcdf6bc: Pull complete
4a3604715398: Pull complete
23594f50f8f8: Pull complete
0d937bb3d139: Pull complete
ac14799c157c: Pull complete
17a2a610bf55: Pull complete
ea91702164e9: Pull complete
Digest: sha256:5c66daea2f43b0dc15ba2ad96e60ce477a3c2a0384a3d06fc79805914c9f16fa
Status: Downloaded newer image for quay.io/minio/minio:latest
Creating Minio ... done
This should be the easy part, let’s open up a Browser and access your Docker hosts IP and the MinIO console port 9001 (e.g. http://192.168.2.105:9001)
Manage Object Storage / Buckets
You should be greeted by a login screen like this:

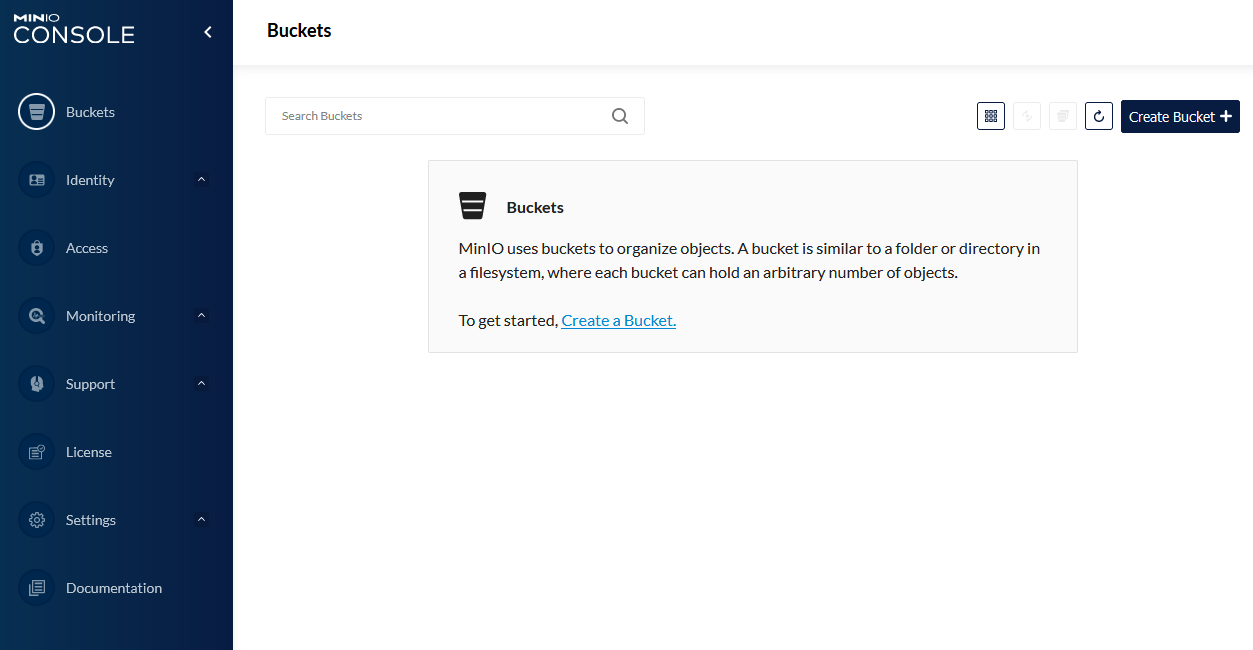
Choose the user you’ve defined with the MINIO_ROOT_USER variable and the initial password you’ve set by defining the MINIO_ROOT_PASSWORD variable in the docker-compose.yaml (In this example admin and supersecret). After the login is done, you see a frontpage which lists your existing buckets, right, there are none. So let’s create one by clicking on the “Create Bucket” button on the top right.
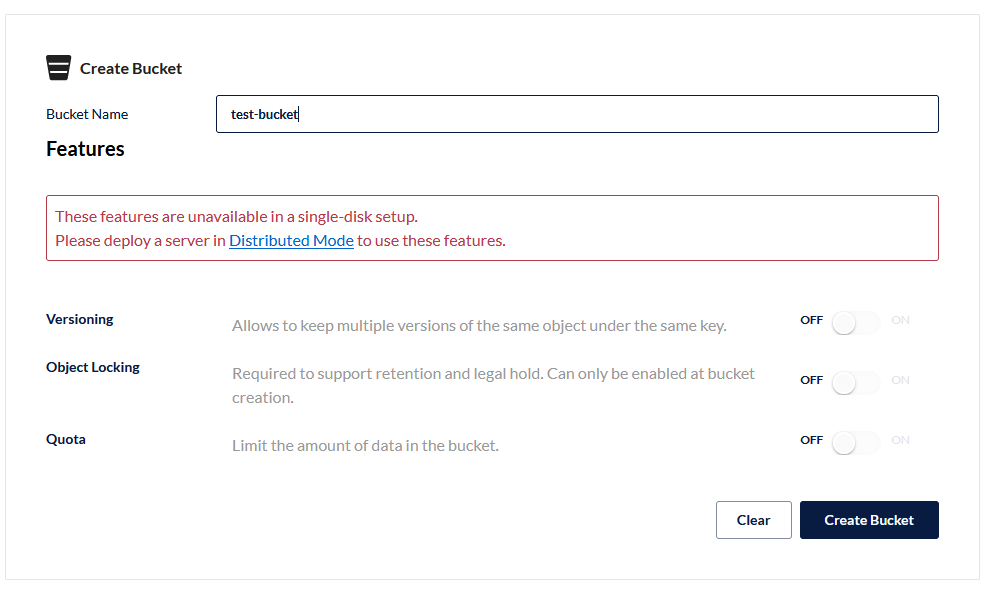
Let’s name the child whatever you want, there is not really much to configure beside the bucket name cause we’re not running the distributed mode in MinIO. So let’s click on “Create Bucket” and we’re done here.
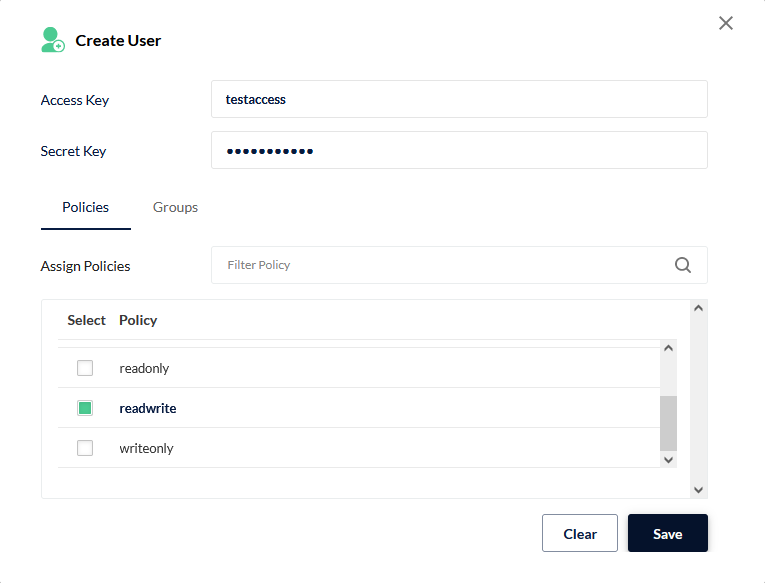
Cause you might not want to use the MinIO root user credentials for working with your buckets all the time, let’s also create a user with the read/write permissions. You can do so by expanding the “Identity” menu on the left and click on “Users”. Then press “Create User”. Again, you’re free to choose whatever you like here, but make sure you’ve selected the “readwrite” policy before creating the user.
Let’s quickly logout and log back in again with your newly created credentials. But you should directly see the test bucket you’ve created earlier. Click the “Browse” button for your bucket and try to upload a file in there.

Head back to your Docker host shell and have a look into the bind mounted directory there. You should be able to see the bucket (as a folder) and your uploaded file also there.
MinIO Client / CLI
MinIO has also some handy commandline interface to interact with your buckets. With that, you can test out if the S3 implementation works. Download and “install” the tool like this:
❯ wget https://dl.min.io/client/mc/release/linux-amd64/mc

--2022-03-20 11:58:02--  https://dl.min.io/client/mc/release/linux-amd64/mc
Resolving dl.min.io (dl.min.io)... 138.68.11.125, 178.128.69.202
Connecting to dl.min.io (dl.min.io)|138.68.11.125|:443... connected.
HTTP request sent, awaiting response... 200 OK
Length: 23330816 (22M) [application/octet-stream]
Saving to: ‘mc’

mc                                 100%[==============================================================>]  22.25M  5.92MB/s    in 4.7s

2022-03-20 11:58:08 (4.75 MB/s) - ‘mc’ saved [23330816/23330816]

❯ chmod +x mc
❯ sudo mv mc /usr/local/bin
Configure your installed MinIO service then by the following command. Be aware, that you have to adjust the IP address of your Docker host as well as the created credentials (username = access key; password = access secret).
❯ mc alias set minio http://192.168.2.105:9000 testaccess supersecret
mc: Configuration written to `/home/user/.mc/config.json`. Please update your access credentials.
mc: Successfully created `/home/user/.mc/share`.
mc: Initialized share uploads `/home/user/.mc/share/uploads.json` file.
mc: Initialized share downloads `/home/user/.mc/share/downloads.json` file.
Added `minio` successfully.
Ok, time to have a look into our bucket shall we?
❯ mc ls minio minio/test-bucket/
[2022-03-20 10:52:05 CET]     0B test-bucket/
[2022-03-20 11:53:46 CET] 1.7KiB STANDARD export.json
[2022-03-20 10:57:28 CET]  24KiB STANDARD initdb.sql
The MinIO Client is a powerful tool. Find an overview of all commands here.
Congratulation, you’ve successfully created your self hosted S3 Object Storage!
Philip
Update 29.03.2023: I’ve created a minio deployment for Kubernetes. So nothing stands between you and running Minio on your Kubernetes cluster anymore. You can find the deployment cookbook here.