
The Zalando Postgres Operator helps you to deploy and manage your PostgreSQL databases easy and quick. In this guide, we will deploy a minimal setup of the Zalando Operator and a Demo Postgres cluster to work with.
The Zalando Postgres Operator has lot’s of features, bells and whistles to tinker with. So the documentation is quite confusing on some parts cause you may do the same thing in three different ways. So I decided, it’s a good topic, to have a small tutorial on. If you want to get through the official documentation and try your luck there, here you can find it. I’ve documented my Operator deployment in my Github repository along with the Operator UI deployment and some demo PostgreSQL cluster deployments (see the README.md).
The actual Operator deployment is mostly done by referencing the existing web resources of Zalando. Let’s create a kustomization.yaml to put all the sources together:
apiVersion: kustomize.config.k8s.io/v1beta1
kind: Kustomization

namespace: postgres-operator

resources:
  - namespace.yaml
  - https://raw.githubusercontent.com/zalando/postgres-operator/v1.7.1/manifests/configmap.yaml
  - https://raw.githubusercontent.com/zalando/postgres-operator/v1.7.1/manifests/operator-service-account-rbac.yaml
  - https://raw.githubusercontent.com/zalando/postgres-operator/v1.7.1/manifests/postgres-operator.yaml
  - https://raw.githubusercontent.com/zalando/postgres-operator/v1.7.1/manifests/api-service.yaml
The only thing, we need to create beside from the kustomization.yaml, is the namespace.yaml. We create two namespaces in there. One for the Operator deployment (postgres-operator) and one for our PostgreSQL databases we will deploy later (postgres).
Let’s apply the kustomization:
kubectl apply -k .After a little while, we have the Operator deployed on our Kubernetes cluster within the postgres-operator namespace. Let’s check the status of the Operator.
kubectl get pods -n postgres-operator
NAME                                    READY   STATUS    RESTARTS        AGE
postgres-operator-849dddc998-mjs69      1/1     Running   2 (7h4m ago)   3d
The Operator team has put together a small Web-UI that helps you to create and manage your clusters conveniently. Let’s deploy this one also. To make this really usable, you need an Ingress Controller running on your cluster. You can find the deployment also in my Github repo under the ui folder. Also here, we mostly rely on the remote repository to deploy the UI, but in my case, I created an ingress.yaml overlay to adjust the Ingress deployment to my environment. Find the kustomization.yaml and the ingress.yaml here:
apiVersion: kustomize.config.k8s.io/v1beta1
kind: Kustomization

namespace: postgres-operator

resources:
  - https://raw.githubusercontent.com/zalando/postgres-operator/v1.7.1/ui/manifests/deployment.yaml
  - https://raw.githubusercontent.com/zalando/postgres-operator/v1.7.1/ui/manifests/ingress.yaml
  - https://raw.githubusercontent.com/zalando/postgres-operator/v1.7.1/ui/manifests/service.yaml
  - https://raw.githubusercontent.com/zalando/postgres-operator/v1.7.1/ui/manifests/ui-service-account-rbac.yaml

patchesStrategicMerge:
  - "ingress.yaml"
apiVersion: "networking.k8s.io/v1"
kind: "Ingress"
metadata:
name: "postgres-operator-ui"
spec:
ingressClassName: nginx
rules:
- host: "postgres-operator.home.lab"
http:
paths:
- path: /
pathType: ImplementationSpecific
backend:
service:
name: "postgres-operator-ui"
port:
number: 80
And let’s apply it:
kubectl apply -k .As mentioned, the Web-UI relies on an Ingress Controller. After you’ve added a DNS entry on your DNS server (in this example postgres-operator.home.lab) to your Ingress Loadbalancer IP, you should be able to access the Web-UI by heading to http://postgres-operator.home.lab.
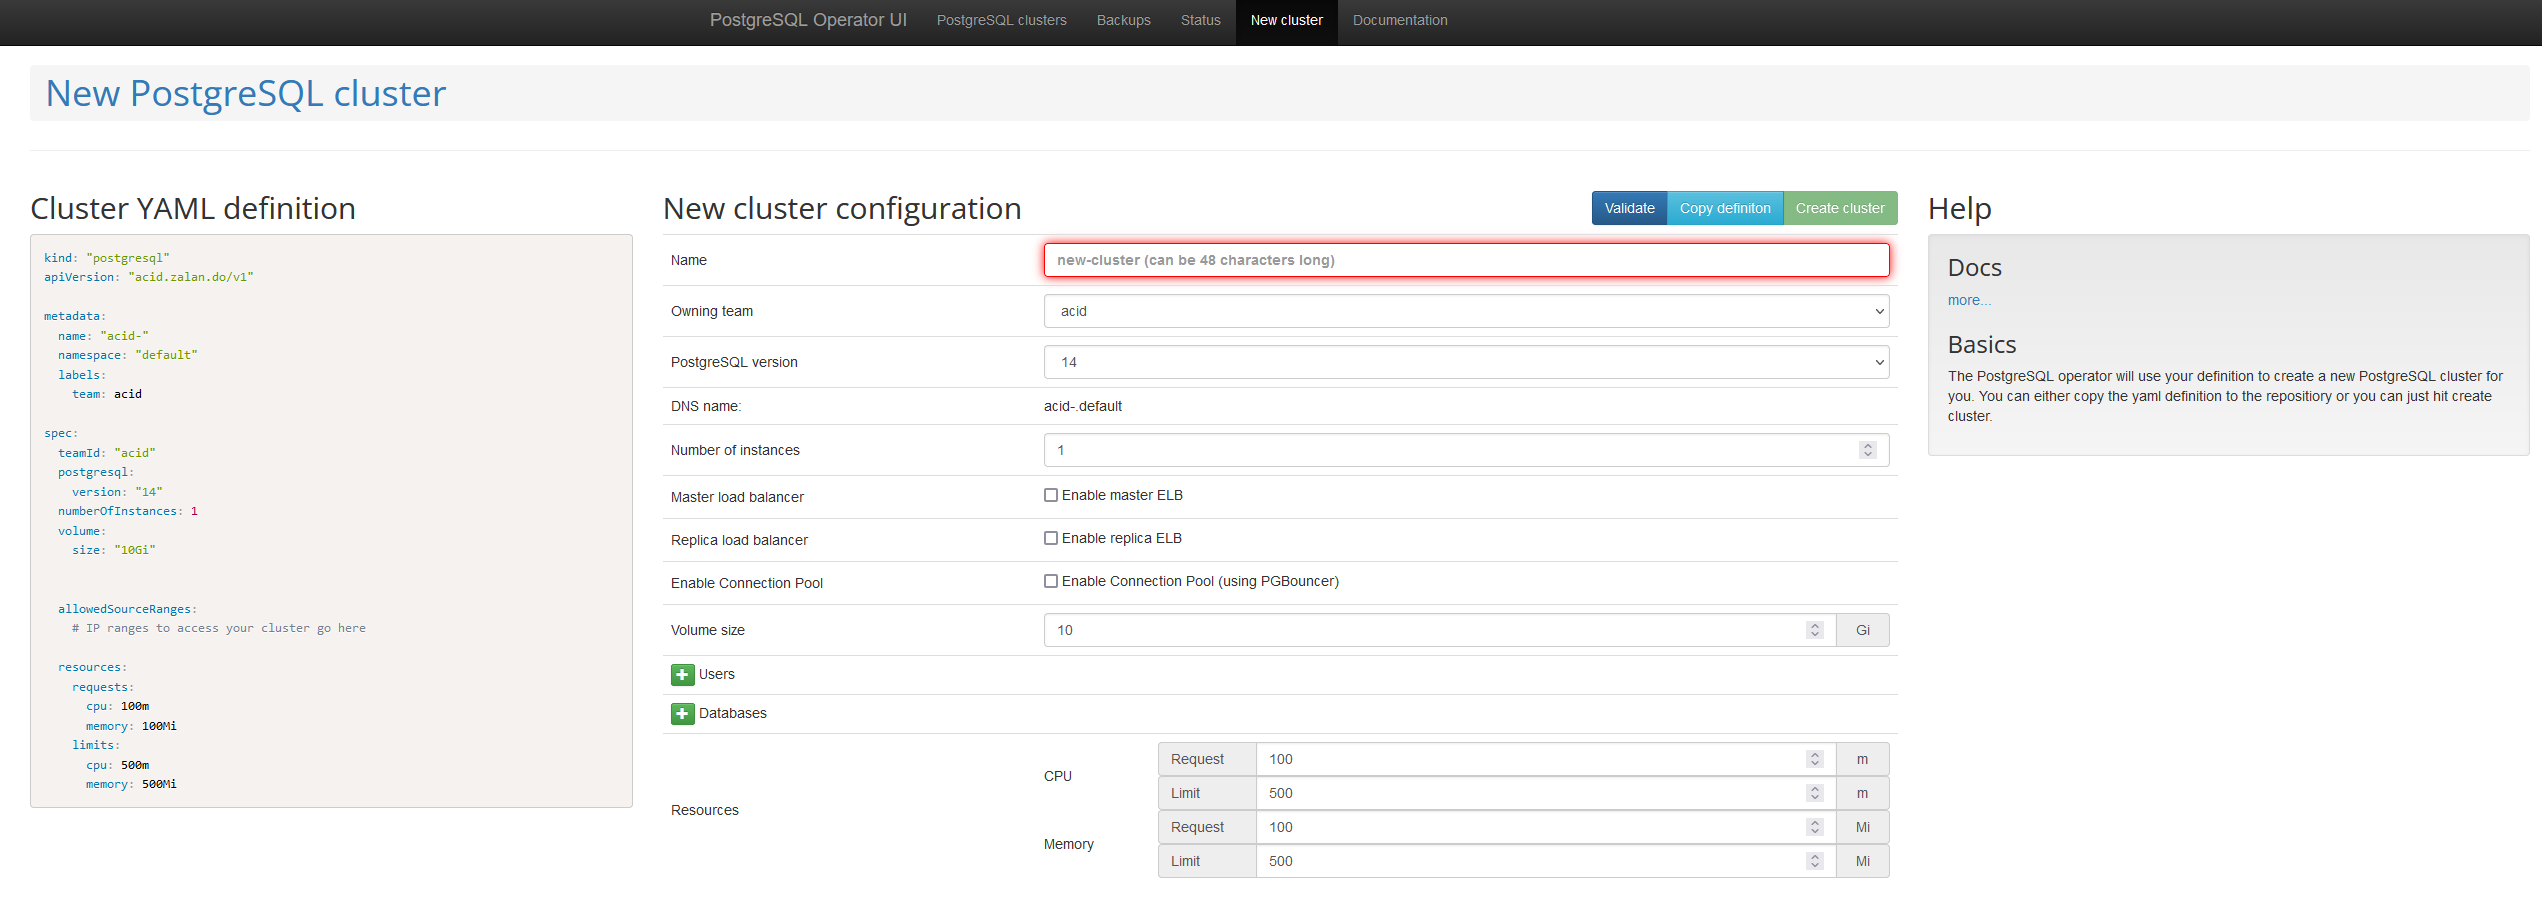
You can now start to create a basic cluster with the Web-UI, but doing it by hand is more fun right? So let’s quickly create a postgresql custom resource (you guessed it, you can find some demo manifests under the manifests folder in my Github repo).
apiVersion: "acid.zalan.do/v1"
kind: postgresql
metadata:
  name: postgres-demo-cluster
  namespace: postgres
spec:
  teamId: "postgres"
  volume:
    size: 2Gi
  numberOfInstances: 2
  users:
    demouser:  # database owner
    - superuser
    - createdb
  databases:
    demo: demouser  # dbname: owner
  preparedDatabases:
    demo: {}
  postgresql:
    version: "14"
Applying this manifest, will create us a “two node” PostgreSQL cluster with a 2GB volume and a database called demo. The way that Zalando Operator deployed database cluster work, it will create a Patroni Postgres cluster for us, so we have high availability out of the box. If one pod crashes or dies (for whatever reason), a failover will automatically happen to the alive node / pod.
The upper deployment creates a cluster without a Service of the type Loadbalancer. To get such a Service, one needs only to add the line enableMasterLoadBalancer: true to our clusters specs. You can find a complete manifest on my Github repo named cluster-demo-loadbalancer.yaml. This will create a Service of type Loadbalancer and adds an IP address to it we should be able to reach from outside the Kubernetes cluster on port 5432.
Let’s apply the CRD and check for the status:
kubectl apply -f demo-cluster.yaml
postgresql.acid.zalan.do/postgres-demo-cluster created

kubectl get pods -n postgres
NAME                      READY   STATUS    RESTARTS   AGE
postgres-demo-cluster-0   1/1     Running   0          2m10s
postgres-demo-cluster-1   1/1     Running   0          76s

kubectl get service -n postgres
NAME                           TYPE        CLUSTER-IP      EXTERNAL-IP   PORT(S)    AGE
postgres-demo-cluster          ClusterIP   10.108.65.151   <none>        5432/TCP   79s
postgres-demo-cluster-config   ClusterIP   None            <none>        <none>     22s
postgres-demo-cluster-repl     ClusterIP   10.105.5.117    <none>        5432/TCP   79s
You can now create a Port Forward (hence we have created a cluster without a Loadbalancer) or you shell into one of the Pods and check the cluster status there:
kubectl exec -it -n postgres postgres-demo-cluster-0 -- /bin/bash

 ____        _ _
/ ___| _ __ (_) | ___
\___ \| '_ \| | |/ _ \
 ___) | |_) | | | (_) |
|____/| .__/|_|_|\___/
      |_|

This container is managed by runit, when stopping/starting services use sv

Examples:

sv stop cron
sv restart patroni

Current status: (sv status /etc/service/*)

run: /etc/service/patroni: (pid 34) 156s
run: /etc/service/pgqd: (pid 35) 156s

root@postgres-demo-cluster-0:/home/postgres# patronictl list

+ Cluster: postgres-demo-cluster (7074623625231069253) ------+----+-----------+
| Member                  | Host         | Role    | State   | TL | Lag in MB |
+-------------------------+--------------+---------+---------+----+-----------+
| postgres-demo-cluster-0 | 10.244.1.4   | Leader  | running |  1 |           |
| postgres-demo-cluster-1 | 10.244.0.241 | Replica | running |  1 |         0 |
+-------------------------+--------------+---------+---------+----+-----------+

root@postgres-demo-cluster-0:/home/postgres#
root@postgres-demo-cluster-0:/home/postgres# su - postgres
postgres@postgres-demo-cluster-0:~$ psql -d postgres
psql (14.0 (Ubuntu 14.0-1.pgdg18.04+1))
Type "help" for help.

postgres=# \l
                                  List of databases
   Name    |  Owner   | Encoding |   Collate   |    Ctype    |   Access privileges
-----------+----------+----------+-------------+-------------+-----------------------
 demo      | demouser | UTF8     | en_US.utf-8 | en_US.utf-8 |
 postgres  | postgres | UTF8     | en_US.utf-8 | en_US.utf-8 |
 template0 | postgres | UTF8     | en_US.utf-8 | en_US.utf-8 | =c/postgres          +
           |          |          |             |             | postgres=CTc/postgres
 template1 | postgres | UTF8     | en_US.utf-8 | en_US.utf-8 | =c/postgres          +
           |          |          |             |             | postgres=CTc/postgres
(4 rows)
As you can see, the database named demo has been created as we specified in our custom resource.
I will write probably a follow up tutorial on how to backup and restore your Zalando Operator deployed PostgreSQL database using WAL-G and a S3 (compatible) Object Storage.
Philip


This is a super useful article. Thank you very much!
Unfortunately I am a complete rookie and I have no clue what you mean with “After you’ve added a DNS entry on your DNS server (in this example postgres-operator.home.lab) to your Ingress Loadbalancer IP, you should be able to access the Web-UI” … what exactly do I have to do?
I am working on Ubuntu 22.04 (I tinker a bit on my home PC and I would like to set up guacamole in kubernetes) and I am using k3d. Where can I find the Ingress Loadbalancer IP and do I need a dedicated DNS server for this to work? Sorry again for the stupid questions.
Hi Christian,
It is not necessary to have a DNS name. You could make a “port-forward” any service or pod in your Kubernetes cluster to your localhost and have a directly access to this service or the pod. For example, if you have a service “postgres-operator-ui” and it’s running on port “80” you can make a port-forward to your local machine on port 8080 by running a command: “kubectl port-forward service/postgres-operator-ui 8080:80 –namespace=”. The same command can be using to connect to the pod just change “service/postgres-operator-ui” to “pod/”. After that you will have an access the Web-UI by heading to http://localhost:8080